Whether you were cleaning the rotor, installing new parts, or just inspecting its shiny chrome insides, the process of reassembling a rotary valve is pretty similar.
You can do this with a simple set of tools. It doesn’t take long, either — in the video below, our technician did it in just over five minutes. (Just note that in this video, the endplate already has the bearings and shaft seals removed.)
Tools to use:
- Allen wrench (AKA hex key)
- Drift pin or flat head punch
- Socket wrench
- Rubber mallet
Steps to reassemble a rotary airlock valve

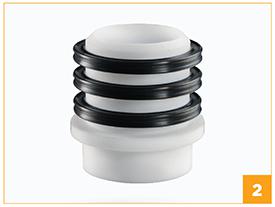
Step 1: Install the quad rings
Start with the inside of the valve endplate (the side that faces the housing). Install three quad rings into the endplate. Add a PTFE based lubricant on the seals and gently push them into the quad ring bore.
Step 2: Install the shaft seal and lock collar
Next, flip over the endplate and install the ACST-4 Glandless Teflon Shaft Seal from the front-facing opening. Assemble the shaft seal lock collar in place, but don’t tighten it yet.

Step 3: Install the bearing
Using proper care and installation practices, the bearing can be mounted in the housing. Align the bearing with the machined hole in the endplate and check the orientation. You can drive the bearing into position by applying light hammer blows to a sleeve placed against the outer race of the bearing. The blows should be evenly distributed around the ring to prevent the bearing from tilting or skewing.
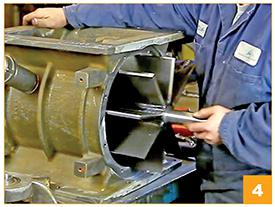
Step 4: Install the rotor
Before installing the rotor, check for any nicks or burrs. Pick up the rotor and gently slide it into the valve housing. To help it slide all the way in, use a rubber mallet to move the rotor vanes inside, past the edge of the housing.
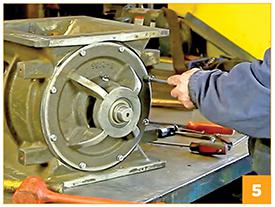
Step 5: Install the endplate
Install the endplate on the housing and add the bolts that circle the rim. You can use a socket wrench to tighten them all the way.
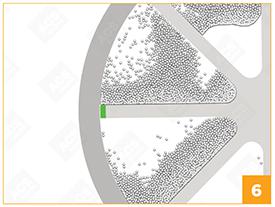
Step 6: Check positioning
Once the endplate is installed, center the rotor in the housing by tapping the end of the shaft. Check the end clearance with a feeler gauge (or dial indicator, in the case of a closed rotor) and reposition the rotor until the end clearance is equal.
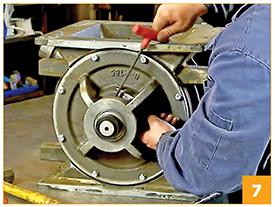
Step 7: Tighten collars
Tighten the shaft seal lock collars using a 1/4'’ Allen key (5/16’’ for larger valves).
Tighten the bearing lock collars in the opposite direction of the shaft rotation. Rotate the collar by using a drift pin or flat punch in the non-threaded hole and tapping the collar with a lightweight hammer in the opposite direction of rotation until it fits snugly.
Use an Allen wrench to tighten the set screw.
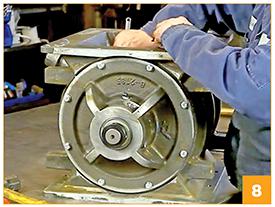
Step 8: Confirm alignment
Turn the rotor by hand. Check the clearances again, and make sure the rotor turns freely in the housing. If it doesn’t turn freely, adjust until it does.
You did it!
That’s a nice-looking rotary valve. Now that it’s all secured, you can get that puppy back into your conveying line to get some material processing done.
If you’re a visual learner, this video shows the steps in full:
You can also reach out to our technical support rep, Paul Bowman, for help with any persisting technical issues. Send us your questions — we’re happy to help.