Cleaning the kitchen, cleaning the bathroom, cleaning your house after an epic party… These are all painful but necessary.
Cleaning a Quick-Clean Valve with RotorRails is pretty much guaranteed to be faster than any of these. That’s because it’s built on a rail system, which means you can slide the rotor in and out of the housing for convenient cleaning. No special tools required.
But there are a few key steps to understand first. Once you get the hang of it, you can do the whole disassembly and cleaning process from start to finish in just a few minutes.
As always, be sure to shut down power and lock out/tag beforehand.
Wait, I don’t need tools?
Not really. There are two slightly different versions of the Quick-Clean valve: one with clamps and one with T-handles. Either way, all the tools you need are secured to the rotary valve itself, which means all you need are your cleaning supplies.
Time required: 5 minutes
(Option A) Clamp Method
One version of our Quick-Clean comes with two clamps. The steps are basically:
- Release the clamps to the open position.
- Slide out the rotor assembly from the housing.
- Clean the rotor vanes and housing.
- Install the rotor assembly into the housing and re-align the rotor with the drive shaft using the locating tool.
- Lock the clamps into position.
Easy as pie.
(Option B) T-Handle Method
Follow this guide for the Quick-Clean model secured by several T-handles.
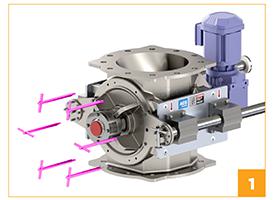
Step 1: Remove the T-Handles
Remove the 6 T-handles that secure the rotor assembly into the housing.
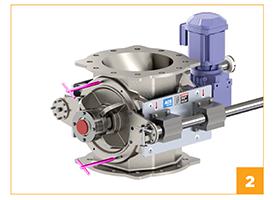
Step 2: Release the Endplate
Install 2 T-handles into the clearance holes nearest the top and bottom of the endplate. Screw the T-handles in until the endplate separates from the housing.

Step 3: Slide the Rotor Out
Slide out the rotor assembly from the housing.
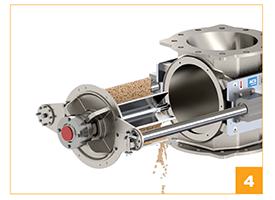
Step 4: Clean Up!
Clean the rotor vanes and housing. It’s even faster with U-shaped rotor vanes!
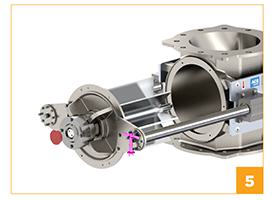
Step 5: Push it Back
Install the rotor assembly into the housing. Remove the bearing cap cover and use the locating tool to align the rotor with the drive shaft.
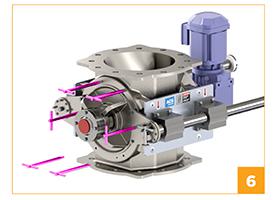
Step 6: Tighten the T-Handles
Replace the bearing cap plug and locating handle. Replace all 6 T-handles to their original positions, and tighten them to secure everything back in place.
Quick, right?
Once you’ve disassembled a Quick-Clean once or twice, it starts to get pretty easy. You’ll be a pro in no time.
If you're more of a visual person, you can always follow this video while you work:
Just in case you do need help with something, we have a team of experts on staff. Give us a call if you need direct technical support.