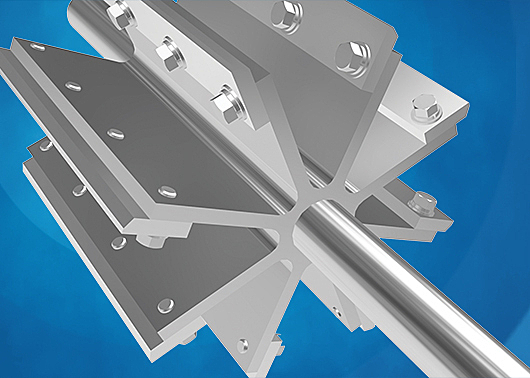
As material chips away at your rotor blades, clearances increase over time. When they get too big, it’s time to replace the rotor – unless your valve has a rotor with adjustable tips. You can renew the clearances on a rotor with adjustable tips to extend its operating life.
Though you won’t need to replace the whole rotor as often, you will need to check the blades on a regular basis. This guide will help you check the clearances and adjust the tips on ACS Valves’ Adjustable Rotor.
As always, start by shutting down your system and performing your lockout and tag procedures. If your valve has a chain drive motor, remove the drive guard and chain before working on the rotor.
Tools to use:
- Feeler gauge
- Wrench
- Thread adhesive
4 steps to check the rotor clearances
Step 1: Number the blades
Number each rotor blade to help you keep track as you make adjustments. Loosen the fasteners, but don’t remove them.
Step 2: Insert the feeler gauge
Get two sets of the appropriate size of feeler gauge for your valve. Insert one set at each end between the rotor tip and housing on the inlet side. Push the blade against the feeler gauge and tighten the fasteners.
Step 3: Adjust clearance
Turn the rotor until the same blade appears on the outlet side, and then measure the clearance to see which side of the airlock is tighter. You should adjust the remaining blades from the tighter position.
Step 4: Do a final check
To double-check the clearances, turn the rotor and check each blade from both sides of the housing and the center.
5 steps to adjust or replace rotor tips
Step 1: Remove fasteners and vanes
Now that you’ve chosen which rotor tips you want to adjust, remove the blade fasteners and vanes. Keep in mind that you should replace the backing plates and hardware in the same position you removed them.
Step 2: Fasten new blades
Make sure the new blades are positioned on the leading edge of the rotor, and then fasten them using a thread adhesive.
Step 3: Tighten the bolts
As you tighten each bolt, make sure the blade is centered between the end caps. Starting from the end caps, tighten the bolts one by one. Be careful not to over-compress the vane tips – flexible material expands when it’s tightened, so too much force can warp the blades.
Step 4: Turn the rotor
As you tighten each bolt and blade, make sure the rotor can be turned by hand. Turn the rotor all the way around the valve housing, checking each blade to ensure the clearance has not decreased.
Step 5: Wrap it up
Repeat the procedure until all the blades are properly installed and the rotor can be turned by hand. If applicable, replace the drive chain, adjust the motor plate, and replace the guard.
That’s all!
Soon you’ll master the art of replacing rotor blades. If you run into any trouble, contact our technical support rep, Paul Bowman. To find out if adjustable tip rotors are right for your application, find a rep in your area.


